Growing Food in Containers
/Last Saturday’s post about building a raised bed is great if you have the space, but what if you don’t? Here’s what you need to know about growing food in containers outdoors. Plus, I’ll walk you through my journey of making my own container garden in San Francisco’s Mission district.
Weeds and veryold roses to clear!
a couple hours later
The right space
Find the sunniest spot of your home. Many vegetables require 6+ hours of sun per day, while many others can tolerate less. An East or West facing patio/deck/yard will work especially well for leafy greens and herbs, while a South-facing spot will get the most sun. If you don’t have any outdoor space, try a windowsill that ideally faces South. Avoid putting containers on wood, because you run the risk of the wood rotting from water damage. If you only have one possible area, that’s ok! You can with what you’ve got.
Here’s the space I chose to work with. Because the sunniest spots of the yard were already occupied, I chose a West-facing side of the yard, against the building. Had a bit of work to do, first…
Choosing containers
The containers you choose to grow food in does not matter too much, as long as you follow these general guidelines:
my assortment of found containers! Clay, wood, and plastic. Even a trash can!
Non-toxic: Choose a container that is made of wood, clay, or even plastic. Avoid containers that are painted on the inside, especially if the paint is chipping away.
Drainage: So important! Make sure that your container has adequate drainage on the bottom. This means at least one hole that will allow water through, but more is generally better. Water needs to be able to drain out of the bottom, otherwise it will rot (this is true for houseplants too)!
To increase drainage, prop up your pot on bricks or pieces of wood. If the hole(s) is big enough that a significant amount of soil could fall through, place a mesh screen or coffee filter over it before filling it with soil.
Many pots sold don’t have drainage holes (WHY?!) If you find yours doesn’t, add them by drilling through the material, if possible.
Porous: Materials like wood and clay are great because they allow more air to travel in and out.
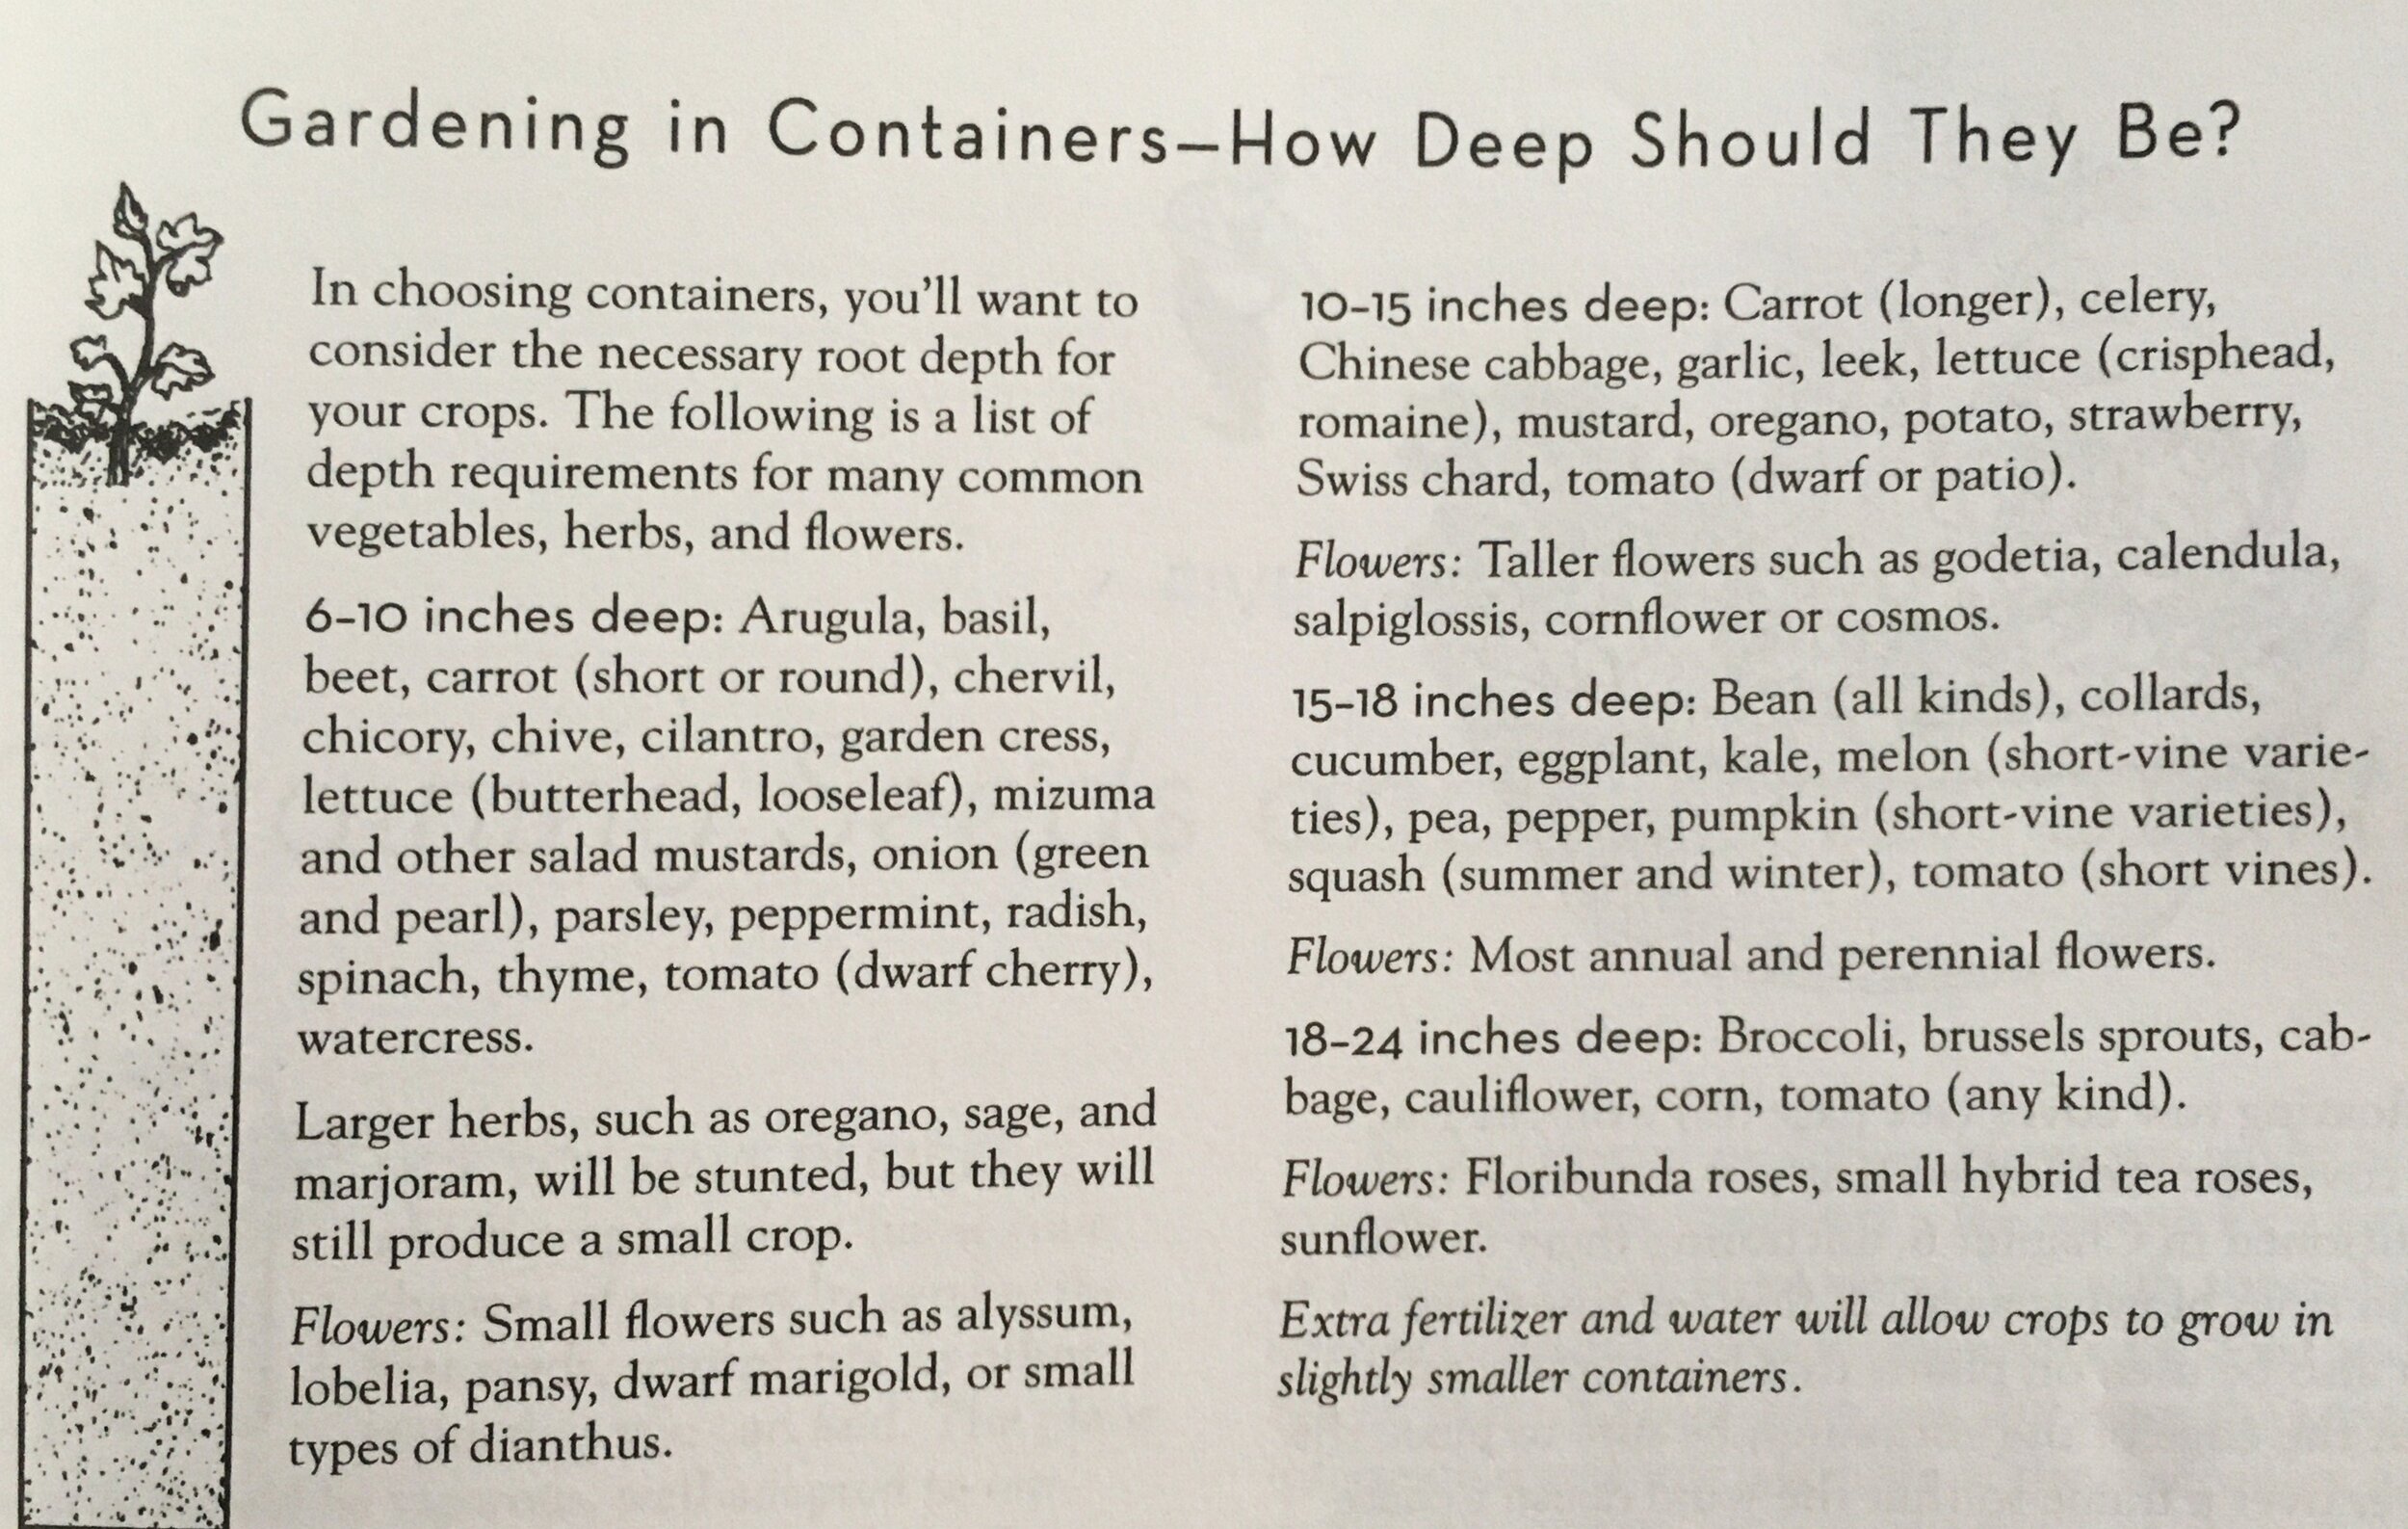
Depth: The depth of the containers you choose can vary depending on what you decide to plant in them. Here’s Pam Pierce’s excerpt about container depth from Golden Gate Gardening:
From golden gate gardening by pam pierce.
the containers at gfe are half wine barrels - easy to find in the bay area!
Soil medium
Using the right soil is a key to success in container gardening. Choose a lightweight planting or potting mix - EB Stone has a great selection. This will ensure the soil will not get too compacted and that water will easily drain through it, and allows the soil to stay evenly moist. Do not use garden soil in your backyard - it will likely become too compacted and suffocate the roots!
You may be curious about whether or not to add gravel or rocks at the bottom of your pots. There is a lot of mixed information out there about this, but the general consensus is no! It will actually hinder the health of your plants.
Each time you harvest and would like to plant something new, it is best practice to replenish any of your planting medium that has washed through, as well as adding a soil amendment high in organic material.
Watering
Plants in containers need to be watered more often than they would in the ground, about every day or every other day. Poke your finger in the soil around the roots to gauge the moisture level. Make sure you are watering you plants at the roots where the water is absorbed, not on top at the leaves.
watering the roots
This frequent watering leeches the nutrients through the soil more quickly (plus the mixes mentioned above don’t have high quantities of organic material in the first place), so keep this in mind as your veggies grow - you may need to add more fertilizer than you would otherwise.
What to plant
Because of their smaller size, things like lettuce, arugula, and herbs tend to thrive in containers, but experiment with any of these!
Pests
See our most recent posts about IPM (integrated pest management). Read on to the following week’s pest post for more info!
As always, commend below or send us your questions via email. We’re here to help!
My container garden lettuce, about a month later.


